

Ring up a cart
1
Pick a category
The category strip runs across the top: All Items plus each category you have created, such as Drinks, Snacks, and Equipment. Keys
1–9 jump straight to a category.2
Find the item
Click any product card to add one to the cart, or type in Search products (F2 or /) to filter by name. The card shows the price and, for stock-tracked items, a stock badge. Items that are out of stock cannot be sold — the card is disabled with a Cannot sell - out of stock tooltip.
3
Adjust the cart
The Cart panel on the right lists each line with its quantity, line total, and a remove button. Use the minus and plus buttons to change quantity; the plus button stops at the available stock for tracked items. Clear Cart empties the whole cart.
4
Go to checkout
Press Checkout at the bottom of the cart, or
F9, once the total looks right.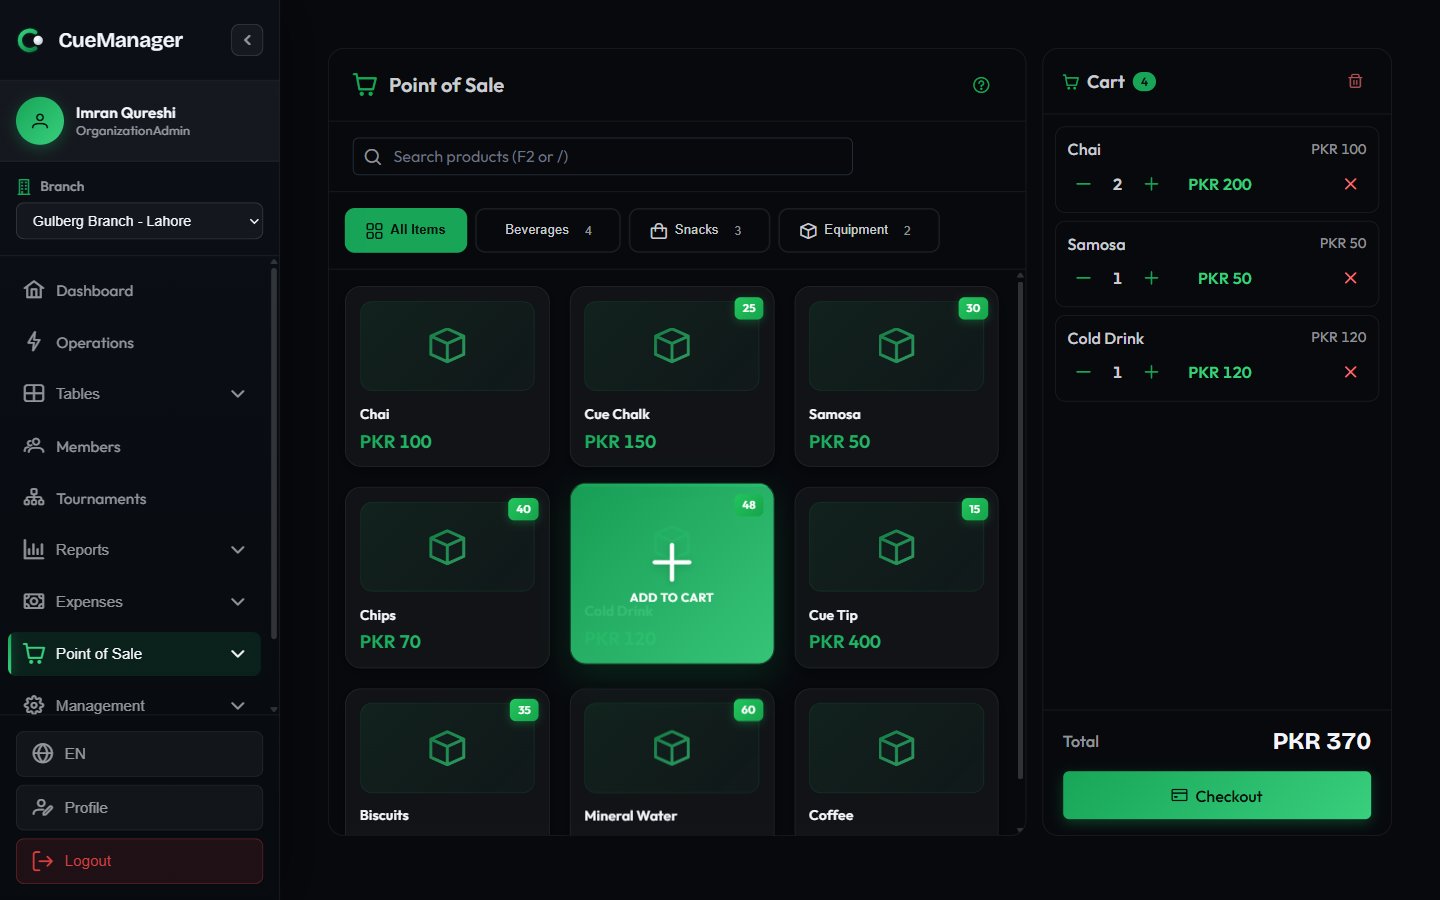
The POS terminal: categories, item grid, and the running cart
Where the sale lands
The checkout dialog decides who pays and when. Three destinations are possible.
The Charge to Table (optional) dropdown lists the branch’s active sessions, labelled with the table and the players — for example
Snooker 2 · Ahmed Raza vs Bilal Khan.
Add to Tab and the Existing tab (optional) picker only appear when the branch has Enable open tabs (running bills) for this branch switched on. See Branches.
Complete a sale
1
Identify the customer
Switch between Walk-in and Member. A walk-in can stay anonymous or be given a name in Customer name (optional); for a member, search by name or phone. A tab needs a named customer — press Add to Tab without one and the dialog asks you to enter a name or select a member.
2
Check the order summary
Order Summary lists each line with its quantity, then Subtotal, a Tax row if a tax rate applies to your club, and Total Amount.
3
Take payment
Choose a Payment Method, then enter what the customer handed over under Amount Received. The Quick Add buttons add 100, 500, or 1000 (
F5, F6, F7) and Exact (F8) fills the exact total, so a Rs 100 chai plus a Rs 400 round is one keypress. Change to Give updates as you type.4
Save it
Add anything worth recording under Notes (Optional) and press Complete Sale. The sale gets a sale number and appears in sales history.
Payment methods
Keyboard shortcuts
The terminal is built for a keyboard-first counter. PressF1 at any time for the full list.
Selling while offline
The till keeps working without a connection. Sales you ring up are saved on the device and sent when the network returns, and the header shows a sale(s) waiting counter so whoever hands over the shift can see that some sales have not reached the server yet. Two things behave differently offline:- The total may be marked Estimated total — the server could not price the cart, so the till applied the last tax rate it saw.
- Stock can go below zero when queued sales replay against a shelf that has since been sold down. Affected items get an oversold badge you can click to open the item’s stock ledger, and the sale is tagged Recount in sales history.
Related
Catalog and stock
Create the categories and items the terminal sells, and keep stock counts honest.
Customer tabs
Run a bill across sessions and sales, then settle once.